Units and screen orientation
Two small settings that change how the app feels all day: whether distances read in kilometres or miles, and whether the screen is free to spin when you tip the bike into a corner. Units live in Settings; the orientation lock is in the menu itself.
Kilometres or miles
-
Open the menu, then tap Settings
It is the last item in the list, below Report a problem.
-
Find Units at the top
Two small chips sit on the right of the row: km and mi. The active one is outlined and filled in green.
-
Tap the one you want
The change is immediate and it sticks. Anything already on screen redraws in the new unit without you backing out of Settings.
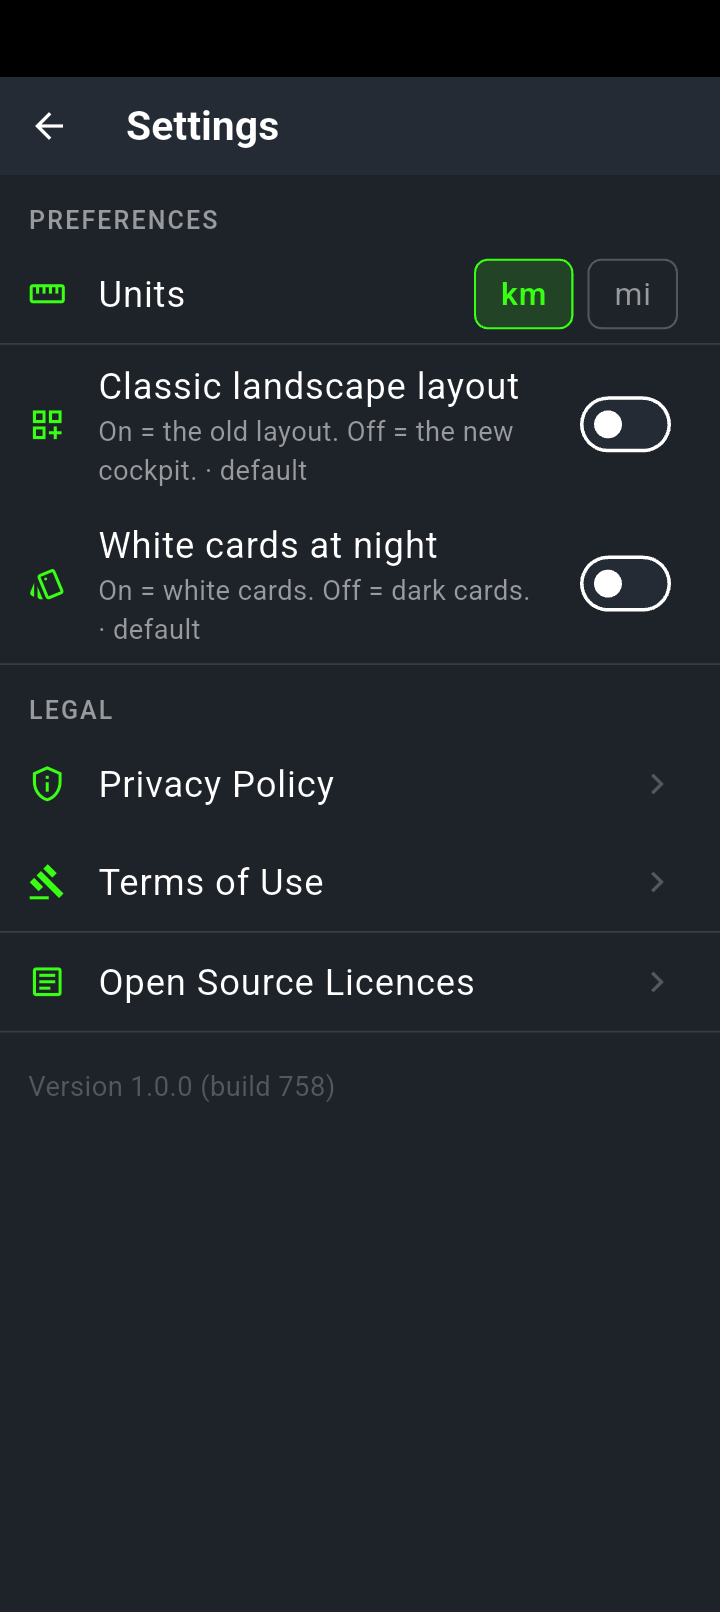
The Units row is the first thing on the Settings screen. The chip with the green outline is the one in use. Below it sit two display switches, both shown here in their factory position.
Note what is not here: speed camera alerts. That switch lives in Ride settings and only there.
What the setting changes
Switch to mi and these all follow:
- The total distance on a planned route
- The distance-to-turn readout while you are navigating
- The speed gauge, which becomes mph
- The speed limit number beside it
- The spoken distances — you hear yards and miles instead of metres and kilometres
Short distances get sensible small units at both ends. In kilometres, anything under 1 km reads in metres; in miles, anything under a mile reads in yards. Spoken distances are rounded to the nearest 50, so you hear In 300 metres… rather than an awkward 287.
Three parts of the app are always metric, no matter which chip you have selected:
- Elevation is always in metres — both the up-and-down axis of the elevation chart and the climb figure in your ride stats. The distance along the bottom of that chart is always kilometres too.
- Round Trip distances are always kilometres. The slider runs from 10 km to 300 km, and the loop it generates is named something like Round Trip — 180 km loop.
- Ride statistics are always kilometres and km/h. The card at the end of a ride reports distance in km and average speed in km/h, and the stats screen shows max and average speed in kph.
If you ride in miles, those numbers will need converting in your head. It is worth knowing before you wonder why one screen disagrees with another.
Locking the screen
By default the app follows your phone, so the screen flips whenever Android decides you have turned it far enough. On a bike that is not always what you want — a phone on a handlebar mount will happily rotate itself when you tip into a bend, or when you pick the bike up off the sidestand.
The lock is in the menu, not in Settings. Open the menu and look for Lock orientation, below the day and night display controls.
With the lock on, two chips appear underneath so you can change your mind without turning the lock off and on again.
The line under the heading always tells you where you stand — Rotate freely when the lock is off, Locked to portrait or Locked to landscape when it is on.
How it behaves
- Flicking it on captures whichever way you are holding the phone at that moment. Hold it in landscape, turn the lock on, and you are locked to landscape. Hold it upright and you get portrait. There is no separate step to choose.
- The two chips override that. Tap Portrait or Landscape and the screen swings round to match, lock still on.
- Turning the lock off closes the menu and hands rotation back to Android. Turning it on leaves the menu open, so the chips are right there.
- It survives a restart. The lock is applied while the app is still starting up, so you do not get a flash of the wrong orientation.
If your mount holds the phone one way and you never change it, set the lock to match and leave it. The screen then stays put through corners, u-turns and stops, and the app never spends a second redrawing a layout you did not ask for.
It only applies while you are in NavForge. Your phone’s own rotation setting is untouched, and other apps carry on as before.
Two landscape layouts
Turn the phone sideways while you’re navigating and NavForge uses what it calls the cockpit layout: the readouts gather into a column down the left of the screen, leaving the map the rest. That’s what you get out of the box.
The older arrangement is still there. In Settings the switch is called Classic landscape layout, and it reads On = the old layout. Off = the new cockpit. It ships off, so cockpit is what you see unless you change it.
Portrait is identical either way, and so is the ordinary map screen when you’re not following a route. If you ride with the phone upright you will never see a difference between the two settings.
One visible consequence worth knowing: in cockpit landscape there is no bar along the bottom. The distance and arrival time you’d normally read there are carried by the destination tile in the column instead, so nothing is lost — it has moved. Flick Classic landscape layout on and the bottom bar comes back.
The switch takes effect immediately, mid-ride if you like, and it’s remembered. If the new layout isn’t for you, that one switch puts everything back.